Template for tutorial creation
This tutorial was created by Name P. Namington.
Email: n.namington@institution.edu.au
Github: @Namesgit
Twitter: @Nameshandle
Getting Setup with Neurodesk
For more information on getting set up with a Neurodesk environment, see hereAn example notebook can be found here: https://github.com/NeuroDesk/example-notebooks/
How to contribute a new tutorial
Welcome to the tutorial template, which you can use to contribute your neurodesk tutorial to our documentation. We aim to collect a wide variety of tutorials and examples representing the spectrum of tools available under the neurodesk architecture and the diversity in how researchers might apply them.
- Tutorials: We kindly ask you to add a concise step-by-step guide for using specific neuroimaging software on neurodesk with screenshots for visual aid.
- Examples: If you want to provide more descriptive details for running specific pipelines, we highly recommend contributing an example (in the form of a Jupyter notebook) to our documentation.
In either case, make sure that all steps of the tutorial work before submitting.
Table of contents
- Create your own copy of NeuroDesk/neurodesk.github.io repository
- Create your tutorial
- Contribute your new tutorial to the official documentation
- Formatting guidelines
- Images
- Alerts and warnings
- Tables
- Lists
Create your own copy of NeuroDesk/neurodesk.github.io repository
Begin by creating a copy of our documentation that you can edit:
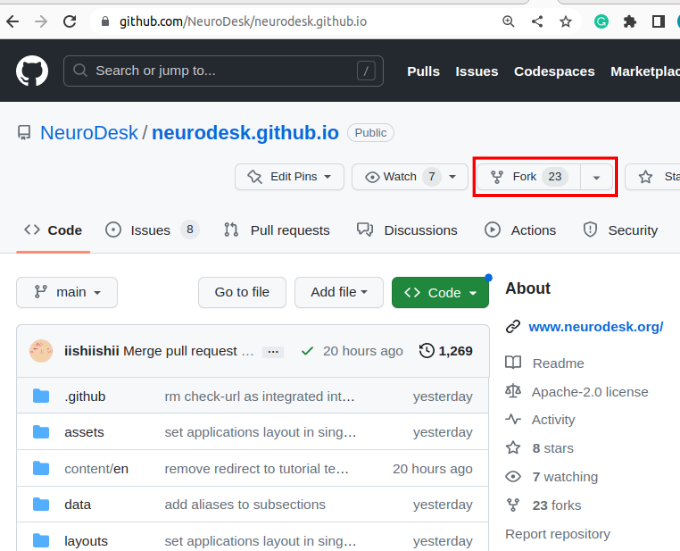
- Visit the GitHub repository for the Neurodesk documentation.
- Fork the repository.
Note
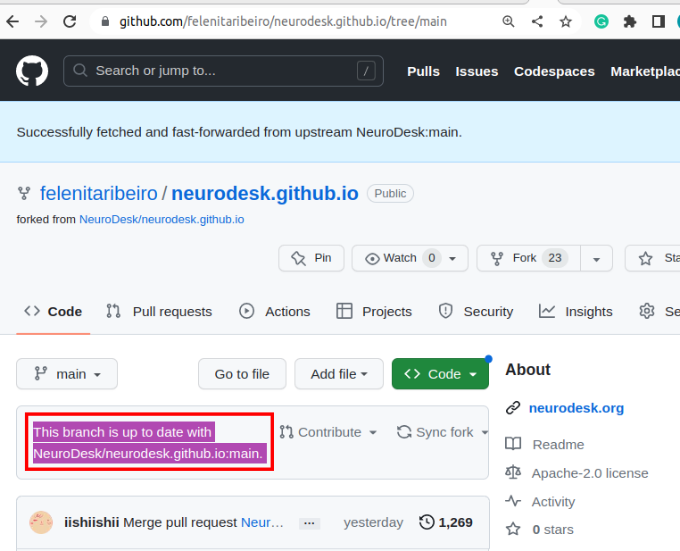
You should now have your own copy of the documentation, which you can alter without affecting our official documentation. You should see a panel stating “This branch is up to date with Neurodesk:main.” If someone else makes a change to the official documentation, the statement will change to reflect this. You can bring your repository up to date by clicking “Sync fork”.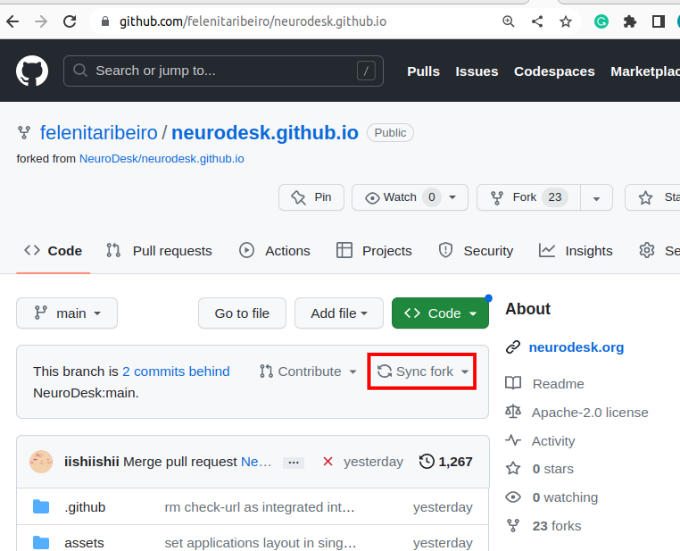
Create your tutorial
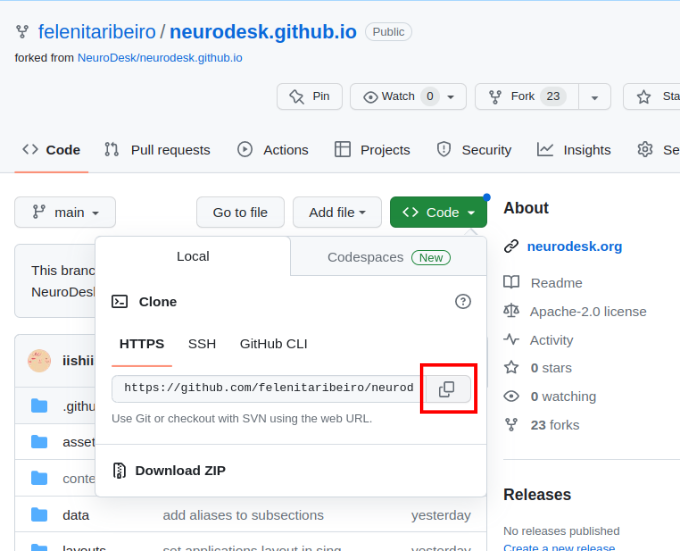
- Clone your forked version of our documentation to a location of your choice on your computer.
git clone https://github.com/YOUR-USERNAME/neurodesk.github.io.git
The URL for the repository can be copied by clicking on the button highlighted below:
- Now, you can open your copy of
neurodesk.github.iousing the editor of your choice (we recommend vscode). Before making changes to the current repository, the best practice is to create a new branch for avoiding version conflicts.
- Create a branch:
git branch tutorial-template
- Checkout the branch you want to use for the addition of your new tutorial
git checkout tutorial-template
- Confirm you are in the right branch:
git branch

Navigate to
neurodesk.github.io/content/en/tutorials-examples/tutorials/and then navigate to the subfolder you believe your tutorial belongs in (e.g. “/functional_imaging”).Create a new, appropriately named markdown file to house your tutorial (e.g. “physio.md”). Images need to be stored in the /static directory - please mirror the same directory structure as for your markdown files.
Open this file and populate it with your tutorial! You’re also welcome to look at other tutorials already documented on our website for inspiration.
Contribute your new tutorial to the official documentation
- Once you are happy with your tutorial, to avoid merge conflicts, rebase your branch with the main branch, which should be synced with NeuroDesk/neurodesk.github.io:main (on GitHub check if your repo is synced and locally checkout the main branch and run git pull).
git rebase main
You might have to correct some merge conflicts, but vscode makes it easy.
Commit all your changes and push these local commits to GitHub.
Navigate to your forked version of the repository on GitHub and switch branches for the one with your additions.
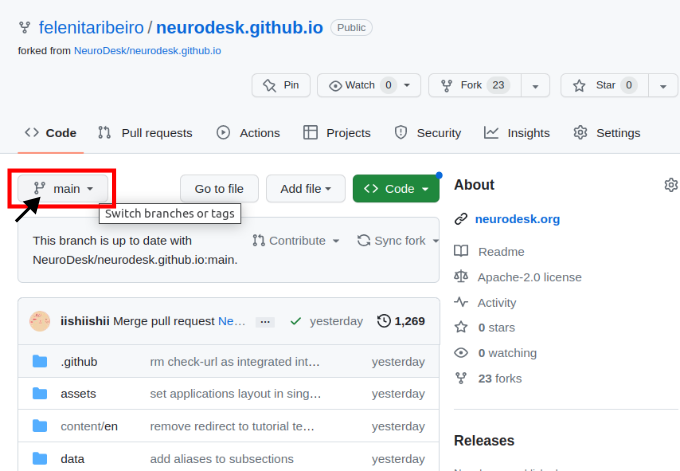
- Now, you can preview the changes before contributing them upstream. For this, if this is your first time to run the Action build, click on the “Actions” tab and enable the Actions (“I understand my tutorials…”). The first build will fail (due to a bug with the Github token), but the second build will work. You can run the workflow if clicking on each of them in the left sidebar.

Then you need to open the settings of the repository and check that Pages points to gh-pages, and when clicking on the link, the site should be there.
To contribute your changes, click “Compare & pull request” and then “Create pull request”.
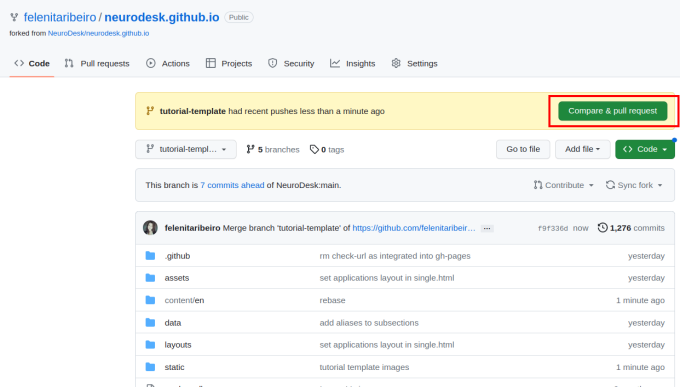
Give your pull request a title (e.g. “Document PhysIO tutorial”), leave a comment briefly describing what you have done, and then create the pull request.
Someone from the Neurodesk team will review and accept your tutorial, which will appear on our website soon!
Thanks so much for taking the time to contribute your tutorial to the Neurodesk community! If you have any feedback on the process, please let us know on github discussions.
Formatting guidelines
As seen throughout this tutorial, you can embellish your text using markdown conventions; text can be bold, italic, or strikethrough. You can also add Links, and you can organise your tutorial with headers, starting at level 2 (the page title is a level 1 header):
Level 2 heading
You can also include progressively smaller subheadings:
Level 3 heading
Some more detailed information.
Level 4 heading
Even more detailed information.
Code blocks
You can add codeblocks to your tutorial as follows:
# Some example code
import numpy as np
a = np.array([1, 2])
b = np.array([3, 4])
print(a+b)
Or add syntax highlighting to your codeblocks:
# Some example code
import numpy as np
a = np.array([1, 2])
b = np.array([3, 4])
print(a+b)
Advanced code or command line formatting using this html snippet:
# Some example code
import numpy as np
a = np.array([1, 2])
b = np.array([3, 4])
print(a+b)
[4 6]
You can also add code snippets, e.g. var foo = "bar";, which will be shown inline.
Images
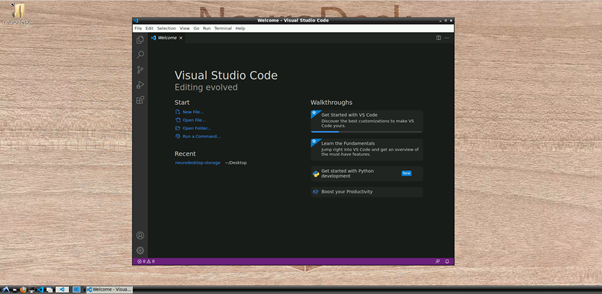
To add screenshots to your tutorial, create a subfolder in /static with the same file structure as in your tutorial markdown file. Add your screenshot to this folder, keeping in mind that you may want to adjust your screenshot to a reasonable size before uploading. You can then embed these images in your tutorial using the following convention:
For a filename.png in a /content/en/tutorials-examples/subject/tutorial1/markdownfile.md use

For example: EEGtut1.png in /content/en/tutorials-examples/tutorials/electrophysiology/eeg_mne-python.md would be

Alerts and warnings
You can grab the reader’s attention to particularly important information with quoteblocks, alerts, and warnings:
This is a quoteblock
Note
This is an alert with a title.Warning
This is a warning with a title.You can also segment information as follows:
There’s a horizontal rule above and below this.
Or add page information:
This is a placeholder. Replace it with your own content.
Tables
You may want to order information in a table as follows:
| Neuroscientist | Notable work | Lifetime |
|---|---|---|
| Santiago Ramón y Cajal | Investigations on microscopic structure of the brain | 1852–1934 |
| Rita Levi-Montalcini | Discovery of nerve growth factor (NGF) | 1909–2012 |
| Anne Treisman | Feature integration theory of attention | 1935–2018 |
Lists
You may want to organise information in a list as follows:
Here is an unordered list:
- Rstudio
- JASP
- SPSS
And an ordered list:
- Collect data
- Try to install analysis software
- Cry a little
And an unordered task list:
- Install Neurodesktop
- Analyse data
- Take a vacation
And a “mixed” task list:
- writing
- ?
- more writing probably
And a nested list:
- EEG file extensions
- .eeg, .vhdr, .vmrk
- .edf
- .bdf
- .set, .fdt
- .smr
- MEG file extensions
- .ds
- .fif
- .sqd
- .raw
- .kdf