Linux
Minimum System Requirements
- At least 3GB free space for neurodesktop base image
- Docker requirements. Details found under https://docs.docker.com/get-docker/
Quickstart
0. Install Docker or Podman
Install Docker from here: https://docs.docker.com/get-docker/. Additional information is available below. Alternatively, Neurodesk also works with Podman (https://podman.io).
To set up Neurodesk on Ubuntu, ensure both Podman client and server are installed. Follow the Podman installation instructions provided at https://podman.io/docs/installation for server setup.
In Ubuntu 20.10 or newer versions, the packages to install Podman are included to download in the standard repository of the system. However, for Ubuntu 20.04, we manually have to add the repository of Podman.
sudo apt update && sudo apt upgrade -y
sudo apt install curl
echo "deb https://download.opensuse.org/repositories/devel:/kubic:/libcontainers:/stable/xUbuntu_20.04/ /" | sudo tee /etc/apt/sources.list.d/devel:kubic:libcontainers:stable.list
curl -L "https://download.opensuse.org/repositories/devel:/kubic:/libcontainers:/stable/xUbuntu_20.04/Release.key" | sudo apt-key add -
sudo apt update
sudo apt-get -y install podman
1. Optional: only for ARM64 hardware
Neurodesk supports ARM64 hardware through binfmt
To enable Neurodesk on ARM64 hardware run this setup step:
sudo docker run --privileged --rm tonistiigi/binfmt --install all
2. Run Neurodesktop
Before the first run, create a local folder where the downloaded applications will be stored, e.g. mkdir ~/neurodesktop-storage
Then use one of the following options to run Neurodesktop:
Option 1 (Recommended for local installations): Neurodesk-App
Instructions on installing and using the app: https://www.neurodesk.org/docs/getting-started/neurodesktop/neurodeskapp/
Option 2 (Advanced and for remote installations): Using Terminal
- If the Linux machine is remote (e.g. in the cloud), connect to the machine with a port forwarding first:
ssh -L 8888:127.0.0.1:8888 USER@IP
- then start neurodesktop:
docker volume create neurodesk-home &&
sudo docker run \
  --shm-size=1gb -it --security-opt apparmor=neurodeskapp --privileged --user=root --name neurodesktop \
  -v ~/neurodesktop-storage:/neurodesktop-storage \
  --mount source=neurodesk-home,target=/home/jovyan \
  -e NB_UID="$(id -u)" -e NB_GID="$(id -g)" \
  -p 8888:8888 \
  -e NEURODESKTOP_VERSION=2025-06-10 vnmd/neurodesktop:2025-06-10
or use the github container registry (in case docker hub is down or blocked in your firewall):
docker volume create neurodesk-home &&
sudo docker run \
  --shm-size=1gb -it --security-opt apparmor=neurodeskapp --privileged --user=root --name neurodesktop \
  -v ~/neurodesktop-storage:/neurodesktop-storage \
  --mount source=neurodesk-home,target=/home/jovyan \
  -e NB_UID="$(id -u)" -e NB_GID="$(id -g)" \
  -p 8888:8888 \
  -e NEURODESKTOP_VERSION=2025-06-10 ghcr.io/neurodesk/neurodesktop/neurodesktop:2025-06-10
or for podman:
podman volume create neurodesk-home &&
sudo podman run \
  --shm-size=1gb -it --privileged --user=root --name neurodesktop \
  -v ~/neurodesktop-storage:/neurodesktop-storage \
  --mount type=volume,source=neurodesk-home,target=/home/jovyan \
  -e NB_UID="$(id -u)" -e NB_GID="$(id -g)" \
  -p 8888:8888 \
  -e NEURODESKTOP_VERSION=2025-06-10 docker://vnmd/neurodesktop:2025-06-10
If you run Ubuntu > 23.10 you need to create this apparmor profile under /etc/apparmor.d/neurodeskapp
# This profile allows everything and only exists to give the
# application a name instead of having the label "unconfined"

abi <abi/4.0>,
include <tunables/global>

profile neurodeskapp "/opt/NeurodeskApp/neurodeskapp" flags=(unconfined) {
  userns,

  # Site-specific additions and overrides. See local/README for details.
  include if exists <local/neurodeskapp>
}
If you get errors in neurodesktop then check if the ~/neurodesktop-storage directory is writable to all users. Otherwise run:
chmod a+rwx ~/neurodesktop-storage
If you get error that’s not assessable on your network or causes problems then you can try to use the DNS server 8.8.8.8 (Google Public DNS) in the Docker command.
docker volume create neurodesk-home &&
sudo docker run \
  --shm-size=1gb -it --privileged --user=root --name neurodesktop \
  --dns 8.8.8.8 \
  -v ~/neurodesktop-storage:/neurodesktop-storage \
  --mount source=neurodesk-home,target=/home/jovyan \
  -e NB_UID="$(id -u)" -e NB_GID="$(id -g)" \
  -p 8888:8888 \
  -e NEURODESKTOP_VERSION=2025-06-10 vnmd/neurodesktop:2025-06-10
- Once neurodesktop is downloaded, leave the terminal open and check which server neurodesktop is running on (Avoid pressing CTRL+C).
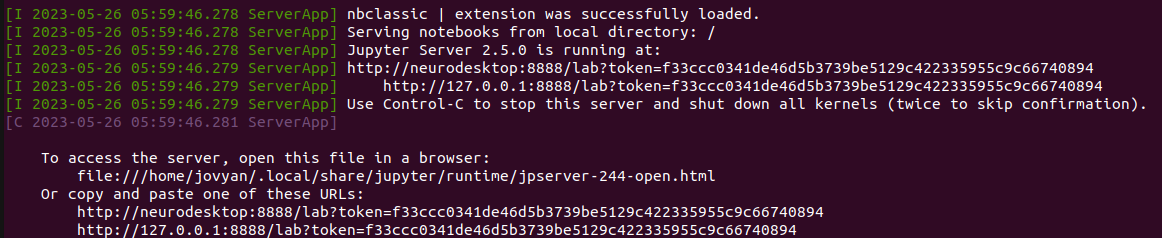
- To access neurodesktop, open your web browser and type in one of the provided URLs in your terminal (e.g.
http://127.0.0.1:8888/lab?token=your_unique_token).
If using Chrome, a pop-up may open with the text:
"http://127.0.0.1:8888 wants to
See text and images copied to the clipboard".
Press “Allow” to access your clipboard from within Neurodesktop.
Press on “Desktop Auto-Resolution” under “ALL CONNECTIONS”
If it is the first time you have used Neurodesktop, wait until the desktop appears (it may take a few seconds). Otherwise, it should appear instantaneously.
Neurodesk is now ready to use! See the tutorials page for advice on how to use Neurodesk.
For an optimal experience, switch your browser to full-screen mode by following the instructions for your browser here: https://www.thewindowsclub.com/open-chrome-edge-or-firefox-browser-in-full-screen-mode
Deleting neurodesktop:
When done processing your data it is important to stop and remove the container - otherwise the next start or container update will give an error ("… The container name “/neurodesktop” is already in use…")
Note
Notice that any data that were saved outside of /neurodesktop-storage would be lost. Please make sure to move all your data to that folder before deleting neurodesktop.Click on the terminal from which you ran neurodesktop
Press
Ctrl-CRun:
docker stop neurodesktop
- Run:
docker rm neurodesktop
Installing Docker
For general installation instructions, refer to https://docs.docker.com/get-docker/
RHEL/CentOS (yum-based)
Refer to https://docs.docker.com/engine/install/centos/
One example to install docker in a yum-based distribution could look like this:
sudo dnf install -y yum-utils
sudo yum-config-manager --add-repo https://download.docker.com/linux/centos/docker-ce.repo
sudo dnf install docker-ce docker-ce-cli containerd.io
# or if dnf not found: sudo yum install docker-ce docker-ce-cli containerd.io
sudo systemctl enable docker
sudo systemctl start docker
sudo docker version
sudo docker info
sudo groupadd docker
sudo usermod -aG docker $USER
sudo chown root:docker /var/run/docker.sock
newgrp docker
Ubuntu/Debian (apt-based)
Refer to https://docs.docker.com/engine/install/ubuntu/
One example to install docker in a apt-based distribution could look like this:
sudo apt-get update
sudo apt-get install ca-certificates curl gnupg
sudo install -m 0755 -d /etc/apt/keyrings
curl -fsSL https://download.docker.com/linux/ubuntu/gpg | sudo gpg --dearmor -o /etc/apt/keyrings/docker.gpg
sudo chmod a+r /etc/apt/keyrings/docker.gpg
echo \
  "deb [arch=$(dpkg --print-architecture) signed-by=/etc/apt/keyrings/docker.gpg] https://download.docker.com/linux/ubuntu \
  $(. /etc/os-release && echo "$VERSION_CODENAME") stable" | \
  sudo tee /etc/apt/sources.list.d/docker.list > /dev/null
sudo apt-get update
GPU support
RHEL/CentOS (yum-based)
sudo yum install nvidia-container-toolkit -y
Ubuntu/Debian (apt-based)
sudo apt install nvidia-container-toolkit -y
Running neurodesktop container with GPU
sudo docker run \
  --shm-size=1gb -it --privileged --user=root --name neurodesktop \
  -v ~/neurodesktop-storage:/neurodesktop-storage \
  -e NB_UID="$(id -u)" -e NB_GID="$(id -g)" \
  --gpus all \
  -p 8888:8888 -e NEURODESKTOP_VERSION=2025-06-10 \
  vnmd/neurodesktop:2025-06-10
Running tensorflow (w/ GPU)
Using tensorflow (python)
mamba install tensorflow-gpu
python
import tensorflow as tf
print("Num GPUs Available: ", len(tf.config.list_physical_devices('GPU')))

Using tensorflow (singularity container in neurodesktop)
singularity pull docker://tensorflow/tensorflow:latest-gpu
singularity run --nv tensorflow_latest-gpu.sif
python
import tensorflow as tf
print("Num GPUs Available: ", len(tf.config.list_physical_devices('GPU')))
